In the last post I mentioned that I will write about the Metal. Well I must reconsider. No Metal needed here. Sorry if I went ahead of the things. Wonder if I even need the Metal all all?
“A canvas is just a rectangular grid of pixels”
Jamis Buck
To create a grid means creating a two-dimensional array. So that’s wha I try to do. A data structure that knows it’s size and contains private variable called grid which is a two dimensional array of RGColors. To create such data structure in Swift is like this:
Like the book suggests all the pixels needs to be initialised to black. To achieve this goal I write a init for the struct so I can’t customise the initialisation of the struct. The init inside RGCanvas will then look like this:
I added this newRGColorBlack() function just so it’s easier to create a black and the code looks nicer. To initialise an array in Swift there is many ways to do it but I decided to use this one. The outer array represent the columns aka. width. And as many columns there is there is an array size of the height for every column.
TESTING TESTING TESTING
Again I almost forget the testing. Yes I’m learning but slowly. The first test is to check that the canvas holds black color in every pixel. So to test that I created test case looking like this:
First I create the canvas using the init method shown earlier. Canvas have size property that is easy to test if it’s equal to given values.
Then the other test. To check if the canvas have only one given color in it. Well here I call the method findPositionOfUnequal(RGColor). This method loops the whole grid in the canvas and IF it finds a color that is not equal to the given color it returns it’s position. Otherwise IF no such color is found it returns nil.
Here we have this new Swift concept, the optional variable. In this case it’s optional that the method returns anything at all. If it founds color it returns it’s position but if not then the return value is nil which is same as nothing. This is the implementation of the method:
Next step is to test how writing a color in to a given pixel is working. The test case is not complex but there is something new to implement. Here is the test case:
There is two lines under the //When comment that needs attention. The firs line writes given color to given point and the next line returns the color from the given position. Wondering why there is that _ mark left of the equal sign? It’s there because the writePixelToRGCanvas() returns Boolen true if the writing is successful and false if it fails. Since in this case the return value is not needed the _ mark is put there so that the compiler knows what to do with it and Xcode won’t complain 🙂
Oh but the implementations. The writePixelToRGCanvas is a function and it looks like this:
Oh that was made to honor the books style. In my case the actual job is done using a method in RGCanvas. This method is different from the previous ones. It has this mutating keyword. Swift uses it to make the function capable of changing the inner values of the struct. In a way it’s a language feature that protects you so you don’t accidentally change things. You must be specific and think through what your doing. If there is not that key word the compiler will give an error and you must cope with that situation. So at the end of the day it’s a good feature. And here is the method:
The other line we are interested is this pixelAt(RGPosition) method call. It returns a RGColor type that represents the pixel on a canvas at specific location or position. I use the RGPosition to fetch the correct pixel from the canvases inner grid variable which is not visible outside the struct. At this point there is no check if the point given as parameter is valid at all. I will add that functionality later. For now the implementation looks like this:
RGPosition? Wonder what that is. Well I just wanted to use separate data structure for the canvas pixel position. Pixels have only (so far) the x and y coordinates. So why use tuple with four elements when only two is needed? And the inner datatype for the pixel coordinates is also different than what it is for the tuple. Pixel coordinates have only unsigned integers. It’s not possible to have negative values for pixels…well you could I suppose but it would add unnecessary complexity in to the data structure. So the RGPosition is just type alias for simd uint2 type like this:
Saving a Canvas
I think this is a cool part. Why? Well a short history review. I have worked a lot with a different kinds of file formats back when I was in my profession as a GIS -specialist (GIS stands for Geographic Information System). There is a ton of GIS formats out there and among them there is a lots of raster aka. image formats to deal with.
The idea that you could write a specification for data and then save that data according to the specification to disk using one system and then move that file and read that data back using another system is kind of fascinating. The two systems could be on a different platforms and be coded using different programming languages and techniques but they can cooperate with the same data when the data is properly formatted according to the specification. So the specification, the rules here, are a good thing. If you obey the rules things work and if you don’t … well things just doesn’t work. Some formats are more strict than others but the common thing is that there is rules 🙂
Jamis has choose to use a open PPM (Portable Pixmap) format. This is actually a format that I was not a very aware of. Kind of a funny :). But it’s a open format and it’s structure is quite easy.
Binary vs ASCII format
One thing about subject above. In this book the format is ASCII format. ASCII format is kind of a common name for the type of the file format which is stored as a plain text.
The binary formats on the other hand are stored on the disk as binary data. So if you open binary file with text editor it’s quite cryptic. You cant’t read it. Well in the movies maybe but not in real life 🙂 Binary formats are usually faster and saves space when compared to ASCII formats.
Back on track
Ok, back to the PPM format. It have a header. A short one. Just containing the information of the size of the image and the max number for pixel channel which in our case is 255. And the first line is P3. It’s the so called magic number – what kind of ppm file we are using. The rest of the file is the pixels.
Every pixel is represented as a three integer values. One value for every channel (RGB). Values ranges from 0 to 255. This means that I must convert my RGColor channels which have values from 0.0 to 1.0 to correct format. This functionality I added to RGColor using extension. The implementation will control that if the channels value is greater than 1.0 it returns 255 and if the value is lower than 0.0 it returns 0. These are the lines I added in to my RGColor extension:
Testing the file format
To test the file format we start with the header. Make sure the header is structured correctly. The header creation is done in a method canvasHeaderForASCIIFormat(). The test case is below.
To create the header I decided to create a method that could be easily extend to support other ASCII format headers too. I created Swift enum called ASCIIImageFormats. One of these enum values is passed as parameter to the method to make the selection what kind of header is generated and returned. Here are the enum and the method respectively.
At the moment there is support for only one format. But to create a support for another it’s easy to ad the new format to enum type and add new switch case in method. Of course it will need its own implementation but the calling interface stays the same.
The following test is here to make sure that generating a ppm file from a canvas works. And this is where I made mistake! Well at first I didn’t noticed the mistake since the test data was quite small. The test was ok. And I didn’t found the mistake until at the end of the chapter where I was working with the “Putting it together” challenge. So for now I show the wrong code here. Test first.
The test includes the next test also which is that the lines the ppm file should not exceed 70 character. The implementation is below (This is the wrong one). It works for now for the test but fails later when saving bigger canvas to file. Many you can see the error?
The last chek is to make sure the implementation is good and the files last character is newline since it’s part of the specification and some programs might not be able to view the image if the character is missing. This test is a short one.
So now everything is done with colors and canvas. There is only this last challenge where I try to put it together 🙂
Putting it together
The storyboard from the previous chapter actually contains pretty much all we need. Only few extra lines are needed to make the challenge work.
First of all I have added some comments in the playground 🙂 Second is that I initialised the projectile and environment variables whit the values Jamis gives in the book. Third I create a canvas of 900 width and 500 height – by the book :). Fourth I choose green to be the color of my projectile.
Fifth the loop already generates the position data for the projectile so I need to take that position and change it to be ready for the canvas. These are the lines to do that. Position y must be subtracted from the canvas to make it right. Our canvas is upside down compared to the image.
Here is the one-liner to add the green color to correct position inside the loop:
Last thing is to save the file to disk. To do that I added this block of code which I have already used in the test cases:
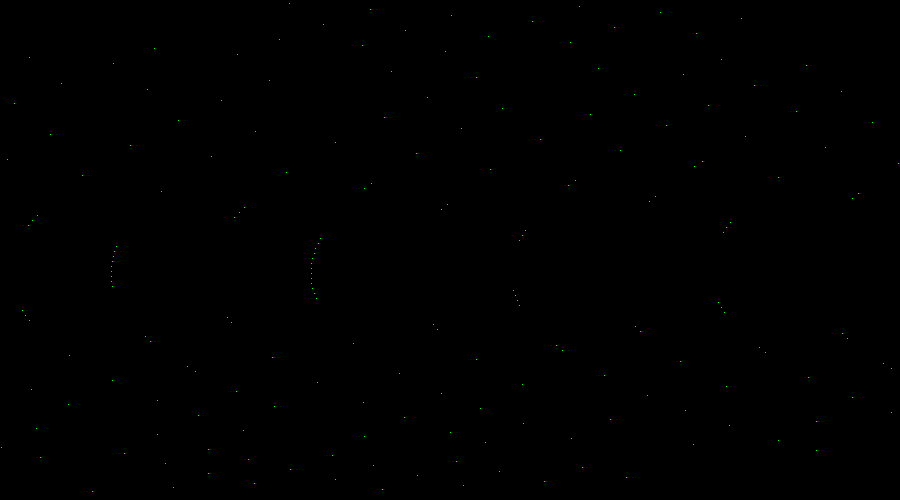
And after running the code –voilà! Here is the image…But…Wait…what? That looks…weird? hmm. What went wrong?

So that’s the result of my mistake earlier. And the mistake was that I was writing the columns first not rows like the book told me to do. To correct my mistake inside the canvasToPPMString() method I had to change these two lines of code from this:
To this:
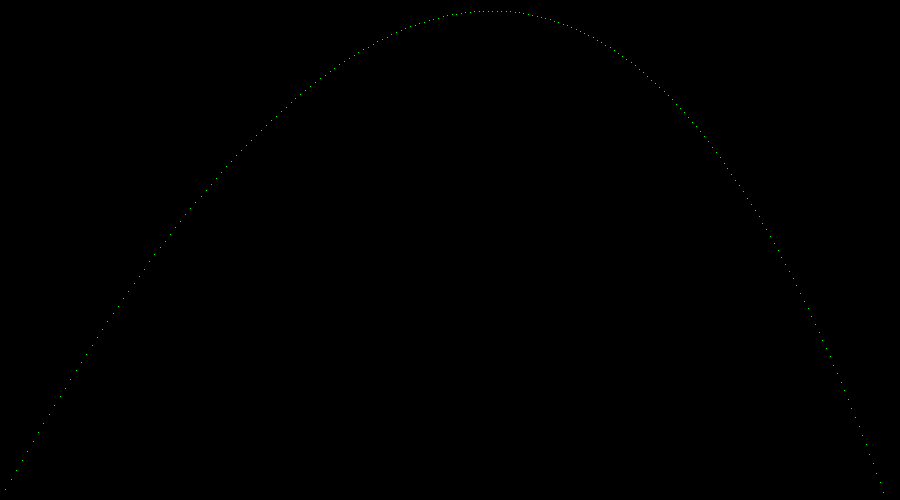
Now when running the storyboard again the image generated looks much better.

Wow. How cool is that 🙂 I think this was a great chapter. The next Chapter is about math. It’s not my strongest area so I guess I would need to take a deep breath first before moving on.
